Mosquito Joe provides a guide on building a natural playground that emphasizes an eco-friendly play spaces.
|
Remember playing outside for hours on end when you were growing up? Adventure was found in your own backyard under rustling leaves. Today, some kids are missing all that fun. They’ve traded blue skies for blue screens, and they don’t even know they’re getting the raw end of the deal.
Too much screen time—whether on smartphones, game consoles, or computers—is linked to sleep disturbances, obesity, and a host of other issues. And a 2018 study by the National Institutes of Health found that two or more screen-time hours correlated with lower language scores!
Fortunately, coaxing your bleary-eyed child into the great outdoors may not be as hard as you think. Create a backyard nature playground, and watch them head for the back door!
1. Choose a Location
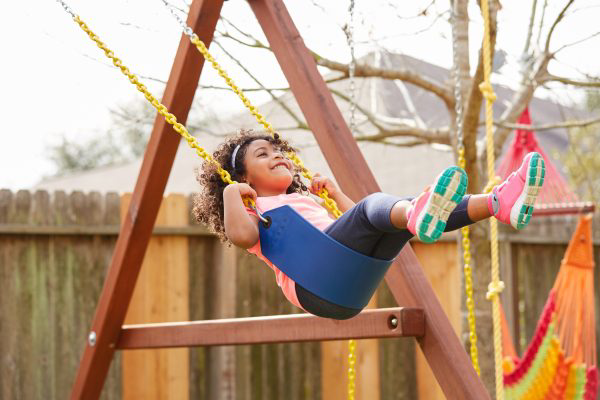
Select a playground location that is both safe and convenient, away from traffic, deep water, and other hazards. If swings will be included, allow plenty of clearance between fences and other obstacles. To make supervision easy, find an area that is clearly visible from a convenient vantage point. Choose a shady spot so that direct sunlight won’t overheat play surfaces, but steer clear of thick weeds and shrubs or heavily wooded areas, where ticks might be lurking.
Look for existing natural features within your yard that appeal to your inner child. Is there a tree with gnarly roots or an old stump to climb and balance on? What about a small hill, a thicket of trees, or large rocks? Grown-up eyes might not see the magic in these objects initially, but kids are innately drawn to simple nature-based settings and materials. Don’t forget to include wide-open space for running, too.
2. Find Intriguing Materials, Starting with These Backyard Playground Ideas
Wondering how to build a natural playground without breaking the bank? Don’t worry—kids’ backyard playgrounds don’t have to cost a fortune. Peruse your storage shed and attic for materials that are languishing. Look for fun items at yard sales and thrift stores. Use your imagination. For example, you can transform old tires into swings or string them together to make a bridge or climbing feature.
Here are more natural playground ideas that are simple and inexpensive:
- Repurpose an old canoe, rowboat, or under-the-bed storage box as a sandbox. Add oars, and it’ll double as a play prop. You may also consider raising the container on a stand and adding tools like measuring cups, scoops, sifters, pots and pans, wooden spoons, and a balancing scale to inspire exploration. Bury items like small rocks, fake jewels, coins, or rubber fishing worms, and let the treasure hunt begin.
- Line up a few landscape timbers to use as balance beams. Make sure the ground and other surfaces near the beams are soft.
- Fill shallow plastic bins with water. These are a favorite, but always supervise young children during water play! Toy boats, turkey basters, sponges, funnels, clean squirt-top containers, and plastic cups for pouring will keep kids busy. Add a splash of dish soap occasionally, and let your kids wash the toys!
- Build an obstacle course or a fort with miscellaneous items. You may choose to use bricks, logs, tires, sturdy boards, tarps, and rope. Interesting “sets” like this boost children’s creativity and logical thinking skills.
- Hang wind socks, chimes, garden flags, and wind spinners. Easily found at dollar or discount stores, these items create a whimsical atmosphere that inspires imagination. You can also create your own wind spinners using old CDs: glue pairs of disks together with the shiny sides facing outward, and string them together with fishing line or string.
- Make a fun “garden” with artificial flowers and plants. Section off a small plot of dirt or a raised garden bed. Let the kids “plant” and rearrange flowers and other items to design their own unique landscapes. Kick up the creativity by adding small garden statues, fairy houses, and plastic toys (dinosaurs, farm animals, action figures, etc.).
- Turn a fence or a sheet of plywood into a chalkboard. Use chalkboard paint or any dark-colored outdoor paint to cover a section of wooden fencing or an old sheet of plywood. Provide your budding artists with colorful sidewalk chalk, and they can draw and share messages on the board.
- Make a tennis ball maze with plastic gutters and drainpipes. This is like a marble track but bigger! Attach straight pipes and elbow pieces to a wall or other vertical, flat surface, to create a track for a tennis ball to roll down. Arrange gutters and pipes at different angles so your kids can drop balls in from various points. If you have older kids, challenge them to build their own mazes with Velcro®-backed pieces.
3. Design Around the Materials You Found
Once you’ve gathered materials, it’s time to organize and set up. Ask your children for their ideas, and encourage them to help with the design. To accommodate a variety of interests and moods, try creating zones or stations for different types of play—from creative to active to calming.
Consider your children’s ages and abilities, and think about skills you would like them to further develop. Items like climbers, swings, and slides promote balance and gross (large muscle) motor skills. Water tables and sandboxes provide sensory input and help develop fine motor skills. Tunnels, forts, and lookout towers stimulate creative and social play.
4. Make Landing Surfaces Soft
No matter how skilled your aspiring gymnasts are, occasional tumbles are inevitable. Be sure that swings and climbing or balancing items are placed over soft ground surfaces like loose sand, wood or rubber mulch, or other spongy materials. Remove large rocks, sticks, or other hard objects in potential fall zones, and teach children to keep those spaces clear of toys and other items.
5. Establish Rules
Neighborhood kids seem to be blessed with a sixth sense that draws them to anything new and exciting. If you build it … they will come. Set ground rules about always checking in with a household adult before playing in your yard. Always provide age-appropriate supervision.
Engage your children in helping establish safety rules. For example, ask your kids to create colorful posters that highlight expectations. Laminate the posters to protect them from rain, and hang them in easy-to-see places.
6. Make It Safer with DIY Maintenance and Home Services
Regularly inspect the play area, structures, and equipment for damage and hazards. Seal or paint wood surfaces to protect them from weather damage. To reduce the risk of ticks—which can transmit Lyme Disease and other illnesses—keep the grass mowed and move woodpiles away from play spaces. Be sure to drain standing water regularly to reduce the mosquito population.
When it comes to your children—and their friends—fun and safety should go together. Consider scheduling regular tick, flea, and mosquito barrier spray treatments from our Mosquito Joe® experts. We even offer all-natural pest control options. Simply book online or call us to get started.
The Benefits of Natural Playgrounds
Natural backyard playgrounds foster creativity, critical thinking skills, and independence—three essential skills for a successful life. According to Stanford Health, kids who play outside often are happier and healthier. Simple activities like digging in the dirt can reduce stress levels and strengthen their immune systems! Building a reliable, intriguing backyard playground that offers ample opportunities for unstructured outdoor play is one of the best gifts you can give your child. Time to grab your kids and get started!